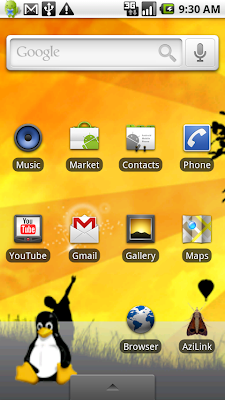
How To Take a Screenshot of your Droid with Ubuntu GNU/Linux
 After looking around for a way to take a screenshot of my Verizon Droid screen, and only finding the non-Linux instructions here, I figured I'd write up the instructions for Ubuntu GNU/Linux 9.10.
Here's how to take a screenshot of your Verizon Droid (Android-Linux based device) using the USB cable and Ubuntu GNU/Linux 9.10.
What you'll need:
Android Linux SDK
Java SE JRE (already installed with ubuntu-restricted-extras)
Follow these steps to get it all setup:
1.) Download the Android SDK. Ok, so you're using Linux now.. and you could just click the link and download the Android SDK. But you really should use 'wget' from the terminal instead. Why? Because wget is awesome! So assuming you agree to the Android SDK License Agreement(req'd), fire up your favorite terminal program, e.g., alt+f2 gnome-terminal, then run this command:
wget http://dl.google.com/android/android-sdk_r04-linux_86.tgz2.) Extract the android sdk:
tar -xvf android-sdk*3. ) Enter the "tools" directory in the newly created android sdk directory (tip: tab completes names in the terminal), and list the contents to ensure you extracted the file:
cd android-sdk-linux_86/tools && ls4.) Install Sun Java 6 JRE - click here to use apt, or run the command below.
sudo apt-get install sun-java6-jre5.) Create/edit/save a rules file for udev to allow your machine to see your Verizon Droid device.
sudo vi /etc/udev/rules.d/91-android.rulesPut the text below into the file(using "i" to enter "insert" mode and hitting the escape key to return to "select" mode before saving.. C'mon, as I've said before, what fun would Linux be without using vi? If you really don't like vi, you can substitute with something like gedit, or nano, or kate, or etc.), replace USERNAME with your Linux login username, then type ZZ to save the file from vi.
SUBSYSTEM=="usb", ATTRS{idVendor}=="22b8", SYMLINK+="android_adb", MODE="0666", OWNER="USERNAME"6.) Set the appropriate permissions to the rules file you just created.
sudo chmod a+r /etc/udev/rules.d/91-android.rules7.) Restart udev to load the new rule.
sudo restart udev8.) Enable "USB debugging" on your Verizon Droid via Settings>Applications>Development.
9.) Connect your Droid to the computer with the USB cable and then use the following adb command(from within the tools directory of the SDK) to check to see that your Droid is recognized:
./adb devicesexample output:
$ ./adb devices
List of devices attached
040364FA0901E011
040364FA0901E011
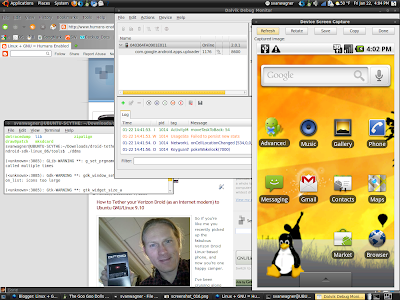
10.) Once you have verified that your Droid is connected, run the tool Dalvik Debug Monitor "ddms":
./ddms11.) Click to highlight your device in the "Name" column(left), then click Device > Screen capture, which should launch a separate window and a screenshot of your Droid (see below).

12.) You can then use the "Save" button to save your Droid screen capture in the .png format, or you can use the "Copy" button and then paste the screens capture into an image editing program, e.g. Gimp.
Note: These same instructions should work for any Android device.. You'll just need to use the "lsusb" command to get the proper deviceid to put in your udev rules in step 5. above.
Droid wallpaper credit: mikemailey.net
GNU/Linux Freedom Rocks!
Shannon VanWagner
01-22-10


Sweet!! Thanks.
ReplyDeleteMuch better than trying to scan the darn thing... :)
Thanks
ReplyDelete